Finally, the old layout is gone, walls have been torn down and rebuilt, and the room is almost ready to start building the new layout. I now have a 12' x 31' room to fit a model railroad into.
These pictures were taken on February 23, 2006, a little over 2 weeks after we started work. The first one is a view toward the part of the room that used to be the Summer Valley Railway. You can see the old benchwork and supports for the new valance hanging from the ceiling on the left side of the room. You can see lots of junk too, but more on that later.
There was a wall 14' from the far end when we started.
This picture is a view toward the other end of the room. The entrance to the room is on the right just around the corner past the tool rack on the wall. The wall had to angle in for a bit on the right to accommodate a landing at the bottom of the stairs. The door at the back of the room leads to the future Dispatchers Office / Control Room / Staging Area / Paint Room. At this time it's being used for another purpose (more later...)
The wall at the far end and the wall on the right were not there two weeks before this picture was taken.
This photo shows the output from my project management application. It's nice to get printer paper that sticks to the wall. And the handwriting font looks sooo... much like my own writing, it's amazing!
I mentioned junk earlier. The main room looked a lot more cluttered before I moved most of it into the Dispatcher's Office. Yikes!
Next, construction of the new room progresses and benchwork construction begins.
Scott
Wednesday, November 29, 2006
Tuesday, November 28, 2006
The Destruction - February 2006
One weekend around the first of February, 2006 we began the grand destruction. In one day the Summer Valley Railway was no more. While the work crew furiously tore up track and plaster we tried to save whatever we could.
Thankfully I had used track nails and good ol' wood glue (wink) to secure things so I was able to salvage about 90% of the track and turnouts. They would certainly come in handy later on the new layout.
All the buildings, vehicles, trees, and other scenic items were packed away long before the crew arrived, of course. It sure wouldn't have been good to have those around when Brian and Clayton got started working! There wouldn't have been anything left!
Unfortunately, I did not take any pictures of this phase of work. It all happened so fast I didn't even think of it. We left the old benchwork where it was, tore down the wall between the train room and family room, built a new wall at the bottom of the stairs, and another new wall at the far end of the room for a dispatcher's office/storage room/staging area. As far as Kim new it was to be a room to spray clearcoat on her tole painting (which it just might be used for some day). Ha!
The next update will include pictures of the nearly empty room after the basic destruction/construction was completed.
Later!
Scott
Thursday, November 02, 2006
Momories of the SVR
Backtracking
I used to have a website for my old model railroad - the Summer Valley Railway - but after the free hosting server "went away" I didn't bother finding a new server. Now, since a friend of mine started a blog for his model railroad - the NeverDone Railway I thought it would be a simple way to get a web site going for my new layout - the Bayside and Tidewater.
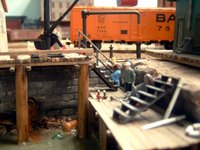
So, I thought I would backtrack a bit with the first few postings to let you know where I've come from to get to where I am now. This group of pictures is from the last run of my old layout which was 12' x 14'. The next few posts will show you the changes that happened last winter to creat the new 12' x 31' layout.
Scott
The local has to wait at yard limits for the Jordan Yard operator to clear an arrival track. Photo taken during the last Summer Valley Railway Op session on Jan. 8, 2006 (Greg, Steve and Brian)
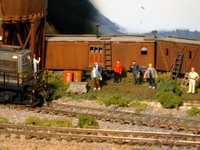
The sun is setting on LookQuick Pass as the last train to ever run on the Summer Valley Railway makes its way from the UMG Subdivision. The MOW crew have gathered to bid farewell.
Subscribe to:
Posts (Atom)